You're reading the documentation for a development version. For the latest released version, please have a look at v0.2.
Pretrigger offset compensation
Classes used:
Description
tr-EPR spectra are typically recorded as full time profiles for a series of magnetic field positions, and to obtain the full kinetics, it is crucial to record the time traces starting before the laser flash.
The part before the laser flash that triggers the actual measurement is usually termed “pretrigger offset”. The first preprocessing step of raw data is hence to take this pretrigger offset and set its average to zero, i.e. average over this part of the time trace and subtract this average value from the entire time trace. This removes any DC offset of the recording.
A prerequisite of this preprocessing step is to have a time trace with a time axis starting at negative times, the trigger being defined by t = 0. If your recorded data start with t = 0 and a laser trigger at a later time t > 0, you need to determine the pretrigger part of your time trace first.
The actual processing step is a two-liner in a recipe:
37  - kind: processing
38    type: PretriggerOffsetCompensation
The other part of the recipe besides loading the data serves rather didactic purposes, such as plotting the raw and processed data and comparing extracted traces before and after processing.
Recipe
 1format:
 2  type: ASpecD recipe
 3  version: '0.2'
 4
 5settings:
 6  default_package: trepr
 7
 8directories:
 9  datasets_source: ../../tests/testdata/
10
11datasets:
12  - speksim/
13
14tasks:
15  - kind: singleplot
16    type: SinglePlotter2D
17    properties:
18      parameters:
19        switch_axes: true
20        tight_layout: true
21      properties:
22        figure:
23          dpi: 300
24        drawing:
25          cmap: twilight_shifted
26      filename: raw.png
27      type: contourf
28    result: 2Dplot
29  - kind: processing
30    type: SliceExtraction
31    properties:
32      parameters:
33        position: 370.6
34        unit: axis
35        axis: 0
36    result: raw-1D
37  - kind: processing
38    type: PretriggerOffsetCompensation
39  - kind: singleplot
40    type: SinglePlotter2D
41    properties:
42      parameters:
43        switch_axes: true
44        tight_layout: true
45      properties:
46        figure:
47          dpi: 300
48        drawing:
49          cmap: twilight_shifted
50      filename: poc.png
51      type: contourf
52    result: 2Dplot
53  - kind: processing
54    type: SliceExtraction
55    properties:
56      parameters:
57        position: 370.6
58        unit: axis
59        axis: 0
60    result: poc-1D
61  - kind: multiplot
62    type: MultiPlotter1D
63    properties:
64      parameters:
65        tight: x
66        tight_layout: true
67        show_legend: true
68      properties:
69        drawings:
70          - label: raw
71          - label: poc
72        figure:
73          dpi: 300
74      filename: raw-poc-1D.png
75    apply_to:
76      - raw-1D
77      - poc-1D
Result
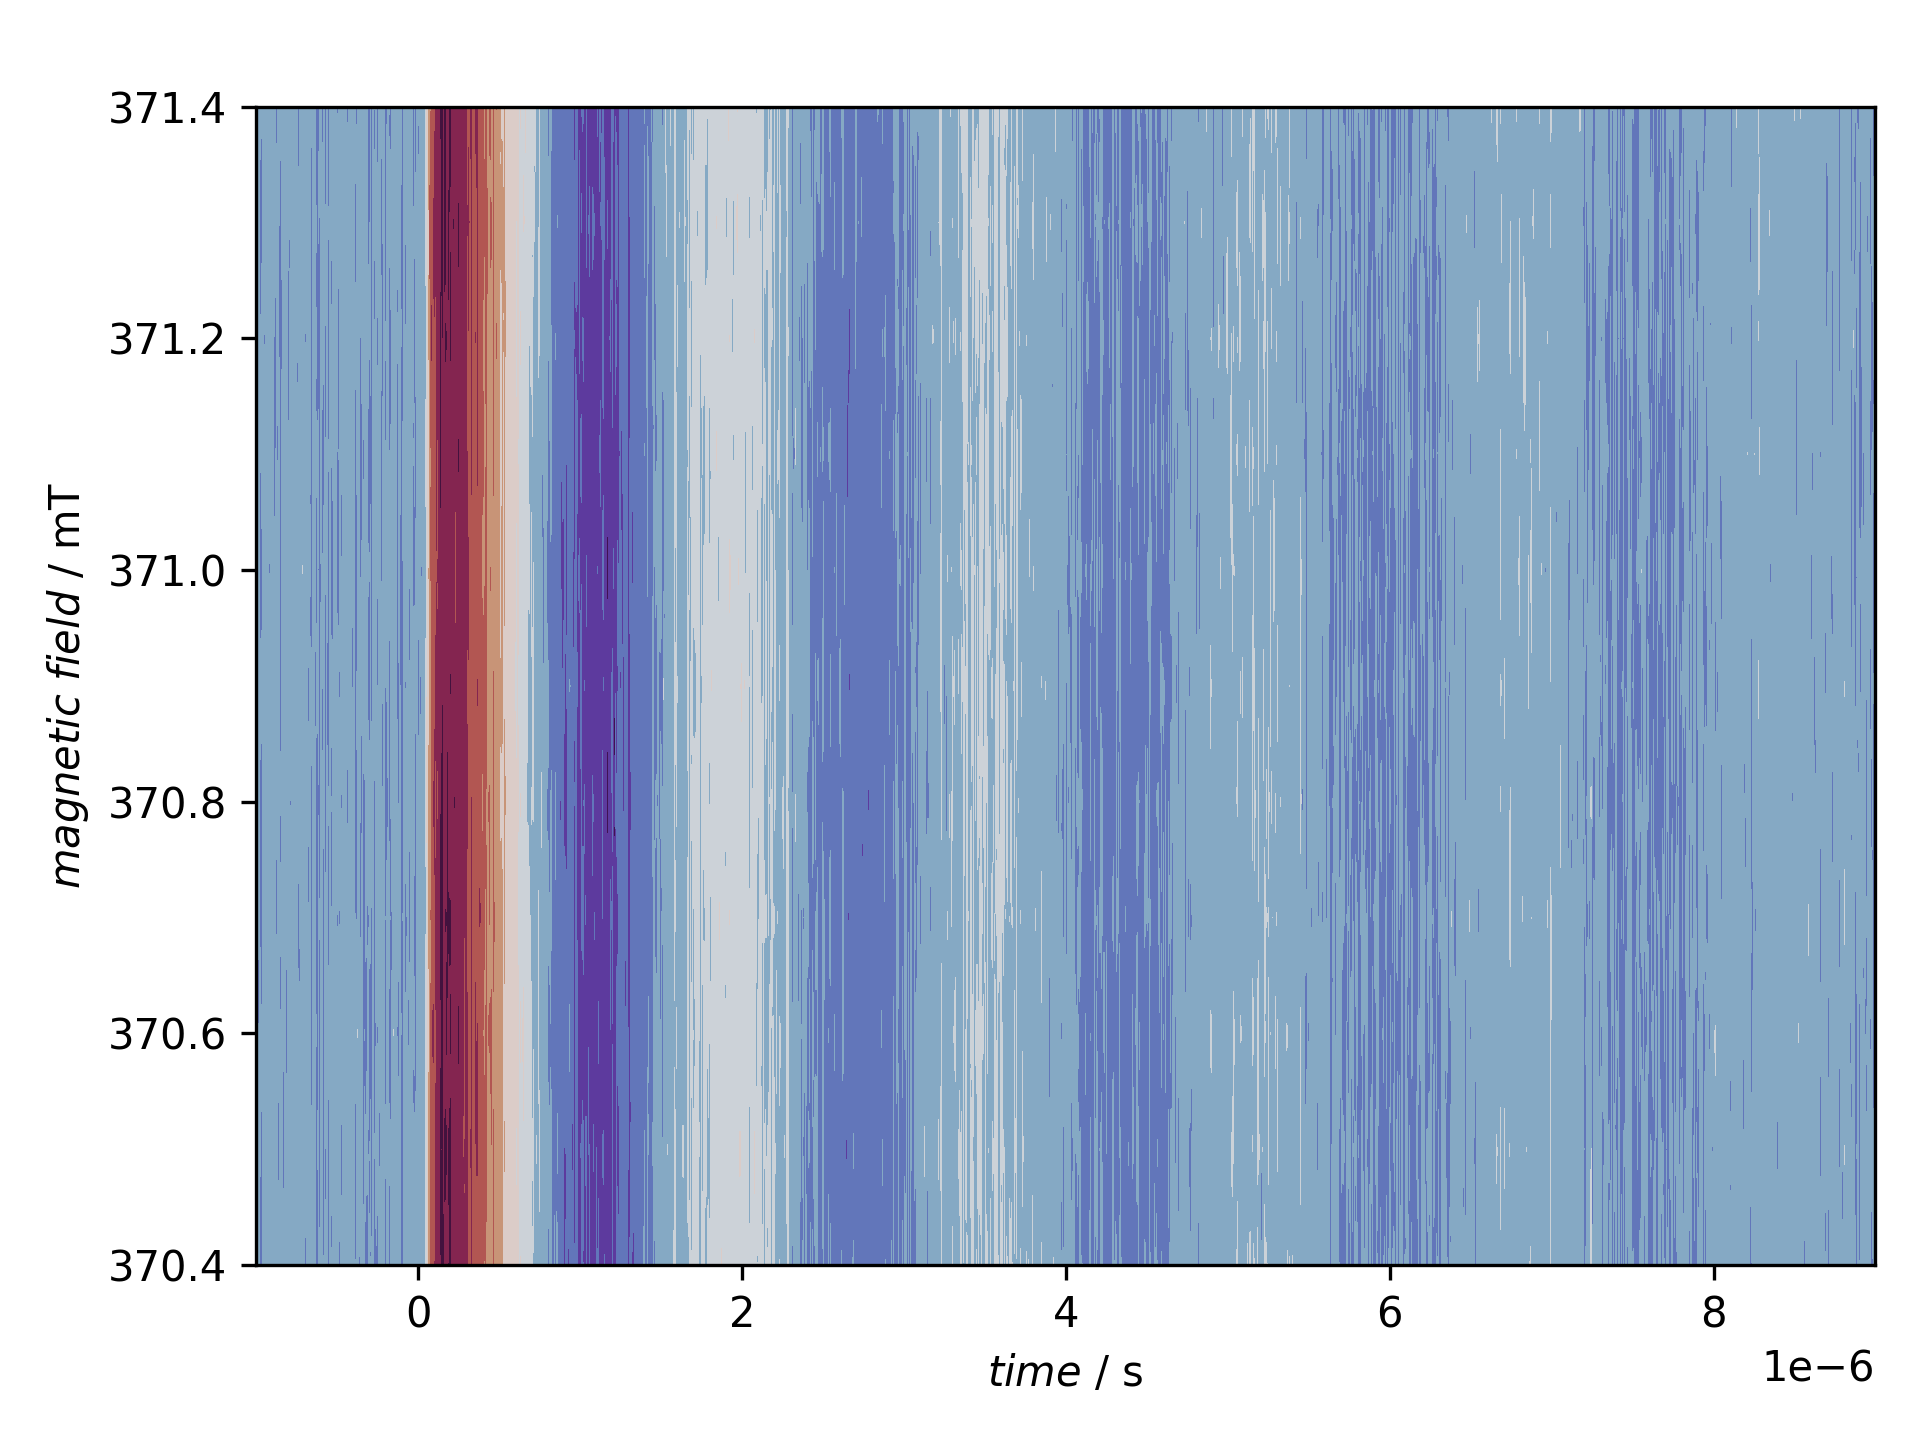
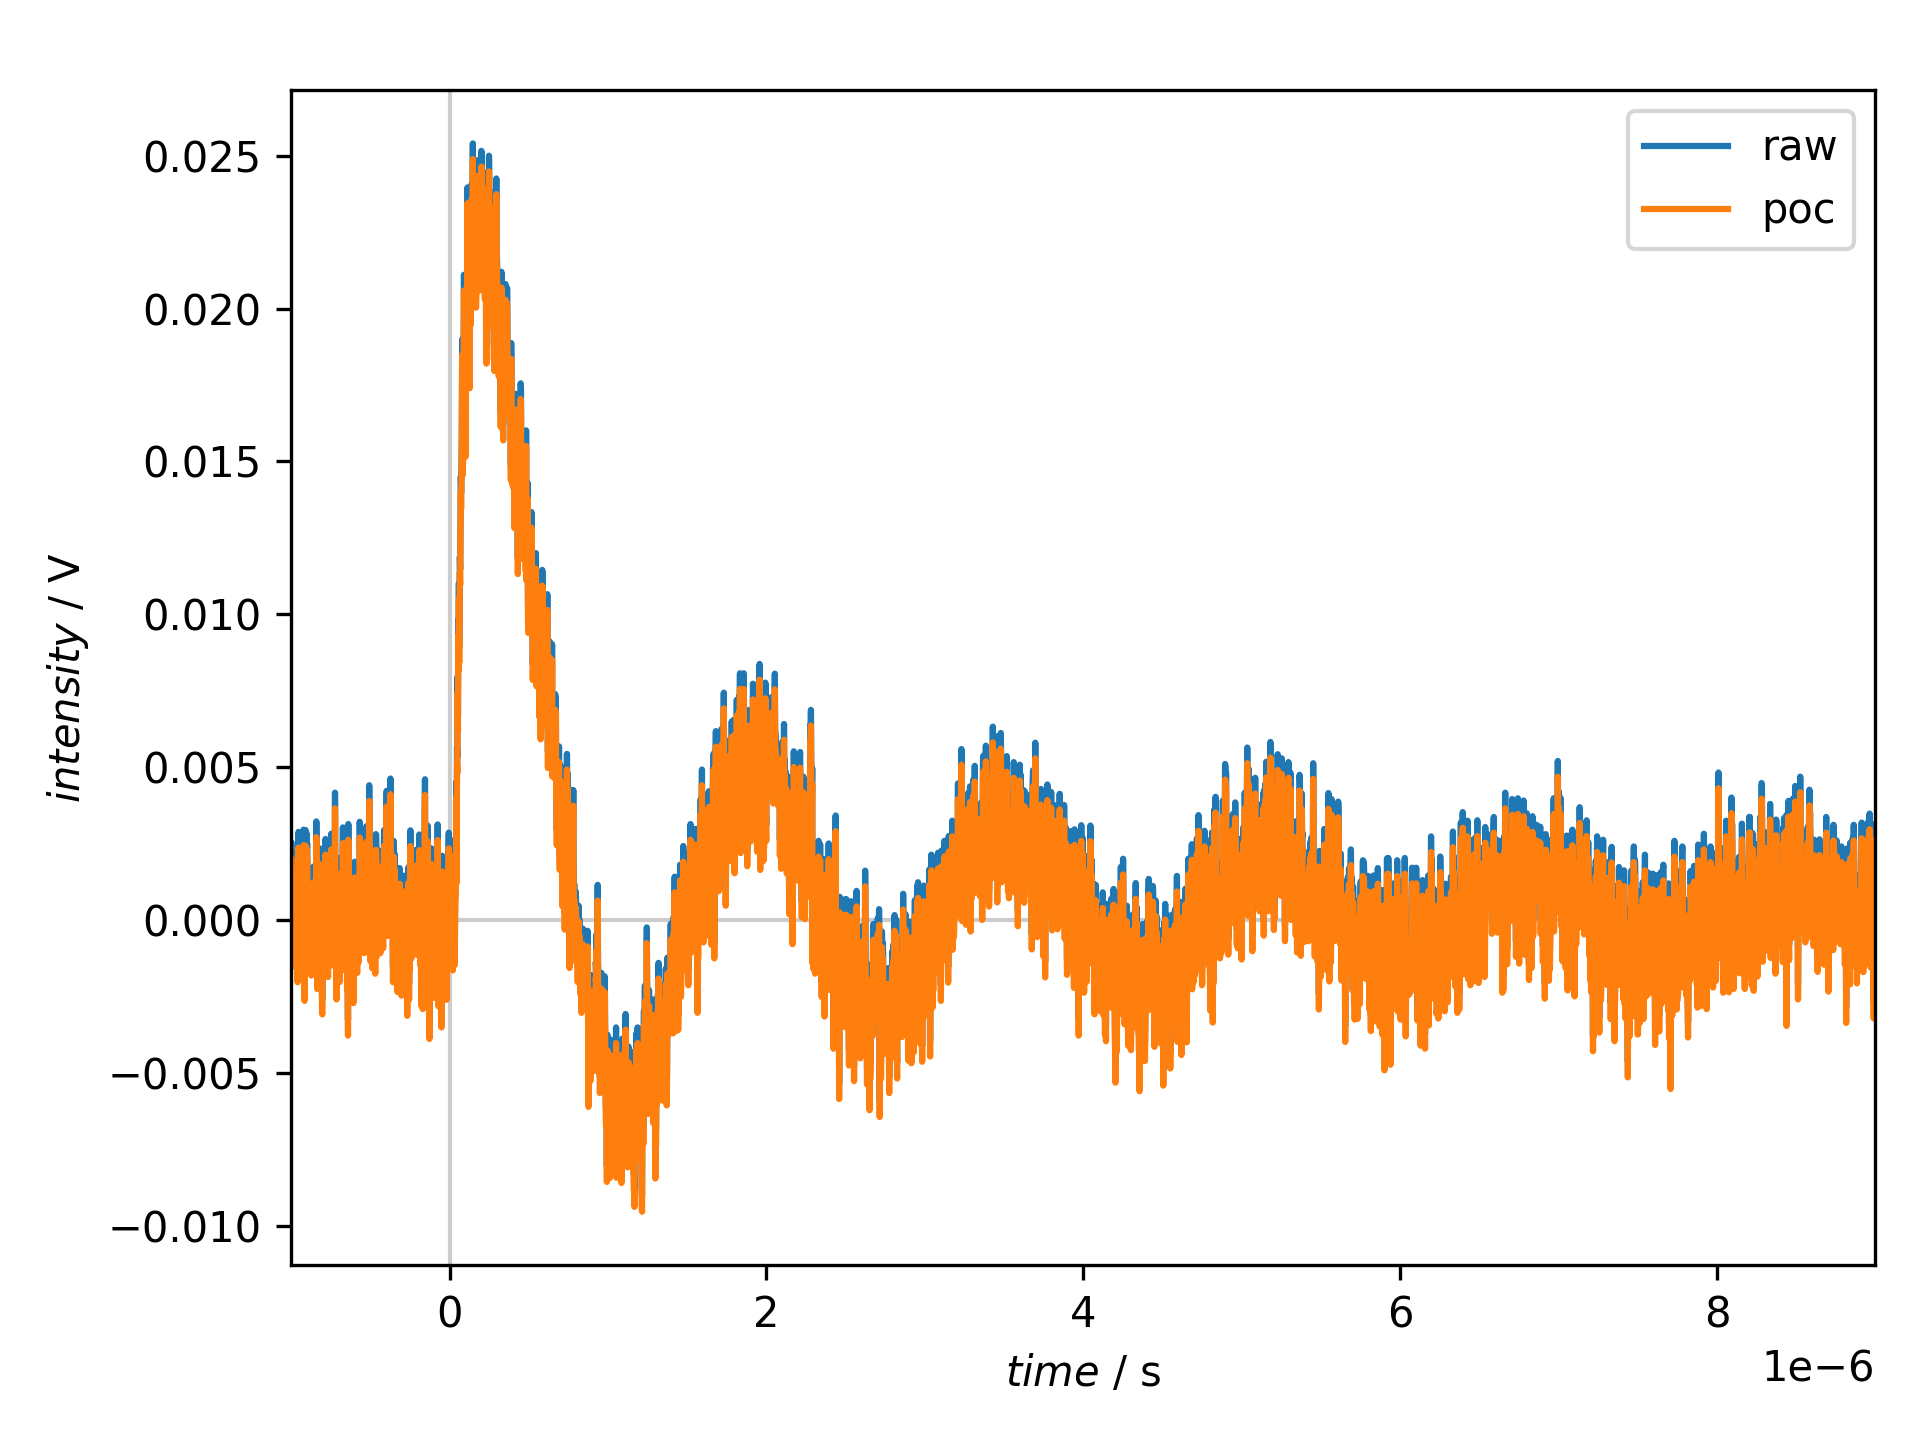
The recipe actually creates three figures presented afterwards.

The raw data as read, before pretrigger offset compensation. The actual signal is an oscillation (transient nutation), and the recorded data cover onyl the signal part.

The data after pretrigger offset compensation. Due to the recording scheme used with internal background subtraction already within the transient recorder, the effect is only very small and barely visible here.

Comparison of the identical time trace before (raw) and after (poc) pretrigger offset compensation. As mentioned above, due to the recording scheme used for these data, the effect is only very small.