You're reading the documentation for a development version. For the latest released version, please have a look at v0.2.
Determining the pretrigger part of the signal (Bruker BES3T)
Classes used:
Description
tr-EPR spectra are typically recorded as full time profiles for a series of magnetic field positions, and to obtain the full kinetics, it is crucial to record the time traces starting before the laser flash.
The part before the laser flash that triggers the actual measurement is usually termed “pretrigger offset”. The first preprocessing step of raw data is hence to take this pretrigger offset and set its average to zero, i.e. average over this part of the time trace and subtract this average value from the entire time trace. This removes any DC offset of the recording.
A prerequisite of this preprocessing step is to have a time trace with a time axis starting at negative times, the trigger being defined by t = 0. If your recorded data start with t = 0 and a laser trigger at a later time t > 0, you need to determine the pretrigger part of your time trace first. This is shown here.
The crucial step is to first determine the trigger and only afterwards proceed with the pretrigger offset compensating and other processing steps:
30  - kind: processing
31    type: TriggerAutodetection
48  - kind: processing
49    type: PretriggerOffsetCompensation
The other part of the recipe besides loading the data serves rather didactic purposes, such as plotting the raw and processed data and comparing extracted traces before and after processing.
Recipe
  1format:
  2  type: ASpecD recipe
  3  version: '0.2'
  4
  5settings:
  6  default_package: trepr
  7  autosave_plots: false
  8
  9directories:
 10  datasets_source: ../../tests/testdata/BES3T/
 11
 12datasets:
 13  - rp-transient-80k-5sc.DSC
 14
 15tasks:
 16  - kind: singleplot
 17    type: SinglePlotter2D
 18    properties:
 19      parameters:
 20        switch_axes: true
 21        tight_layout: true
 22      properties:
 23        figure:
 24          dpi: 300
 25        axes:
 26          title: raw data
 27        drawing:
 28          cmap: twilight_shifted
 29    result: plot-raw
 30  - kind: processing
 31    type: TriggerAutodetection
 32    result: trigger
 33  - kind: singleplot
 34    type: SinglePlotter2D
 35    properties:
 36      parameters:
 37        switch_axes: true
 38        tight_layout: true
 39      properties:
 40        figure:
 41          dpi: 300
 42        axes:
 43          title: trigger detected
 44        drawing:
 45          cmap: twilight_shifted
 46    apply_to: trigger
 47    result: plot-trigger
 48  - kind: processing
 49    type: PretriggerOffsetCompensation
 50    apply_to: trigger
 51    result: poc
 52    comment: >
 53        Compensate for DC offsets of the signal prior to the laser flash
 54  - kind: singleplot
 55    type: SinglePlotter2D
 56    properties:
 57      parameters:
 58        switch_axes: true
 59        tight_layout: true
 60      properties:
 61        figure:
 62          dpi: 300
 63        axes:
 64          title: pretrigger offset compensated
 65        drawing:
 66          cmap: twilight_shifted
 67    apply_to: poc
 68    result: plot-poc
 69  - kind: processing
 70    type: BackgroundCorrection
 71    properties:
 72      parameters:
 73        num_profiles: [1, 1]
 74    apply_to: poc
 75    result: bgc
 76    comment: >
 77        Correct for laser-induced background signal.
 78  - kind: singleplot
 79    type: SinglePlotter2D
 80    properties:
 81      parameters:
 82        switch_axes: true
 83        tight_layout: true
 84      properties:
 85        figure:
 86          dpi: 300
 87        axes:
 88          title: background corrected
 89        drawing:
 90          cmap: twilight_shifted
 91    apply_to: bgc
 92    result: plot-bgc
 93  - kind: compositeplot
 94    type: CompositePlotter
 95    properties:
 96      properties:
 97        figure:
 98          dpi: 300
 99          size: [8, 7]
100      grid_dimensions: [2, 2]
101      subplot_locations:
102        - [0, 0, 1, 1]
103        - [0, 1, 1, 1]
104        - [1, 0, 1, 1]
105        - [1, 1, 1, 1]
106      sharey: true
107      plotter:
108        - plot-raw
109        - plot-trigger
110        - plot-poc
111        - plot-bgc
112      filename: basic-processing-bes3t-overview.png
Result
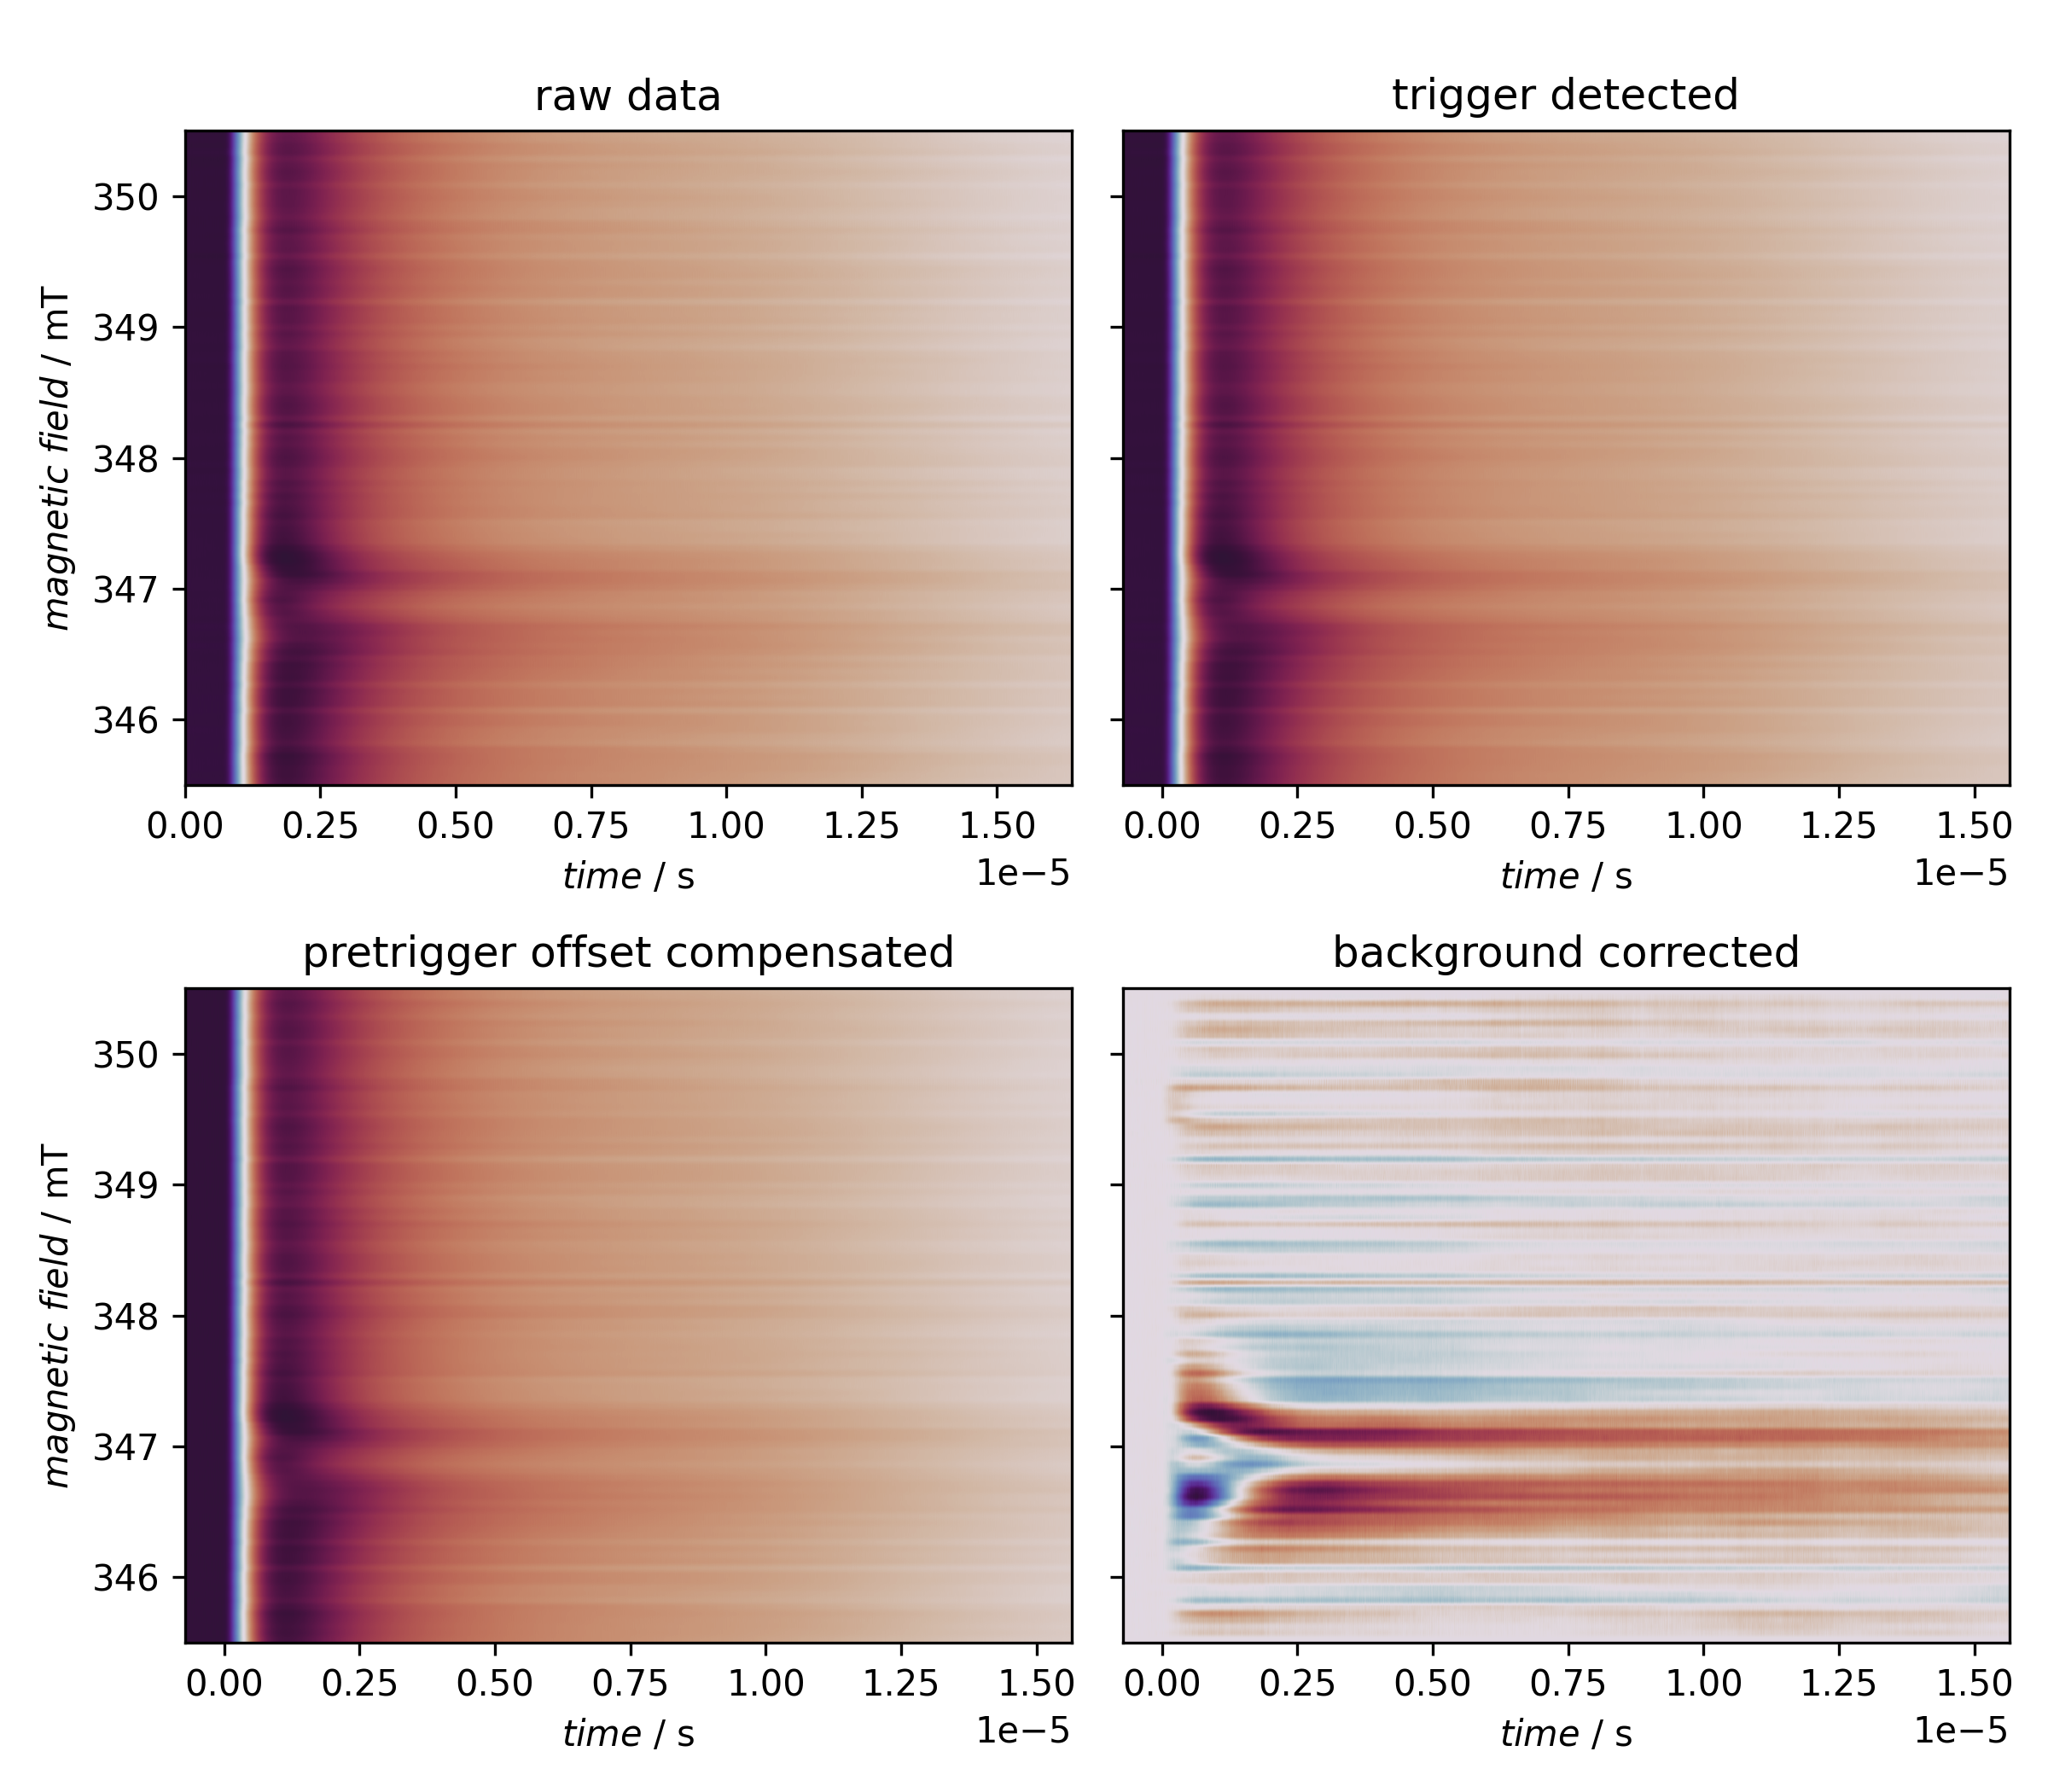
The recipe actually creates one figure with four panels presented below.

Overview of standard processing steps of tr-EPR data if no pretrigger part is explicitly recorded. The first step here is to determine the trigger position. Only afterwards can the DC offsets of the transients prior to the laser flash be compensated, followed by subtracting the laser-induced background.